
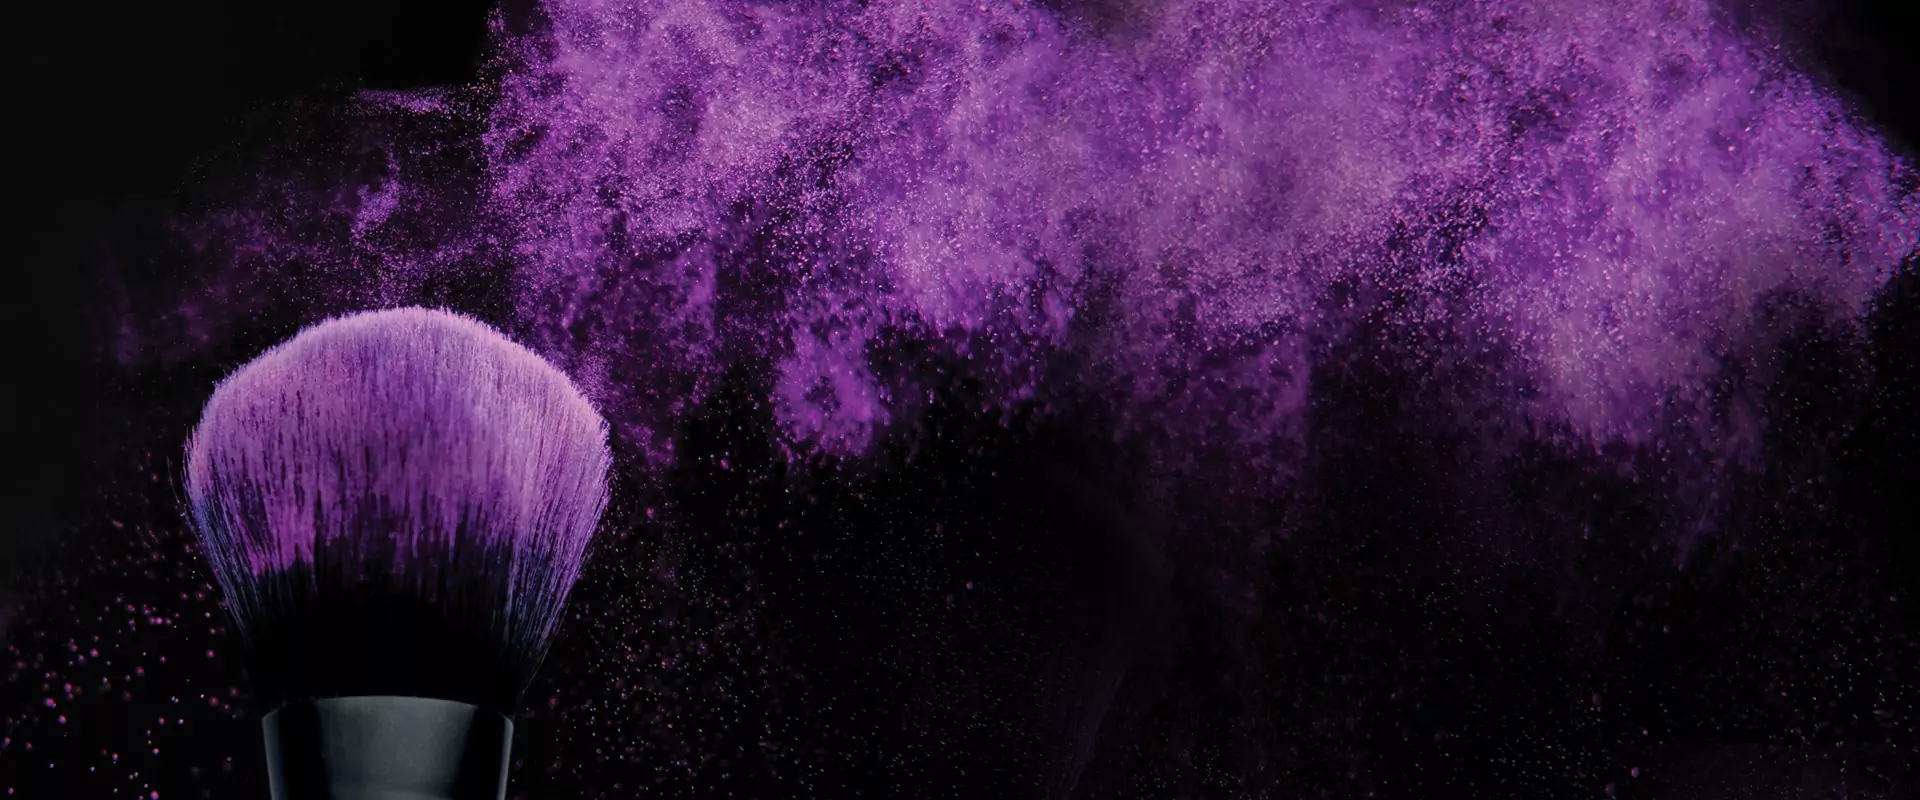
Mastering the Art of Makeup Brushes
Introduction :
Welcome to the enchanting universe of makeup, where brushes become the artists’ tools, crafting beauty with every stroke. In this extensive guide, we embark on a journey through the myriad of makeup brushes, unraveling the secrets behind their names and exploring the depths of their uses. From the broad strokes of general face brushes to the intricate details of eye area brushes and the precision of lip brushes, this guide will be your compass through the mesmerizing landscape of makeup tools.
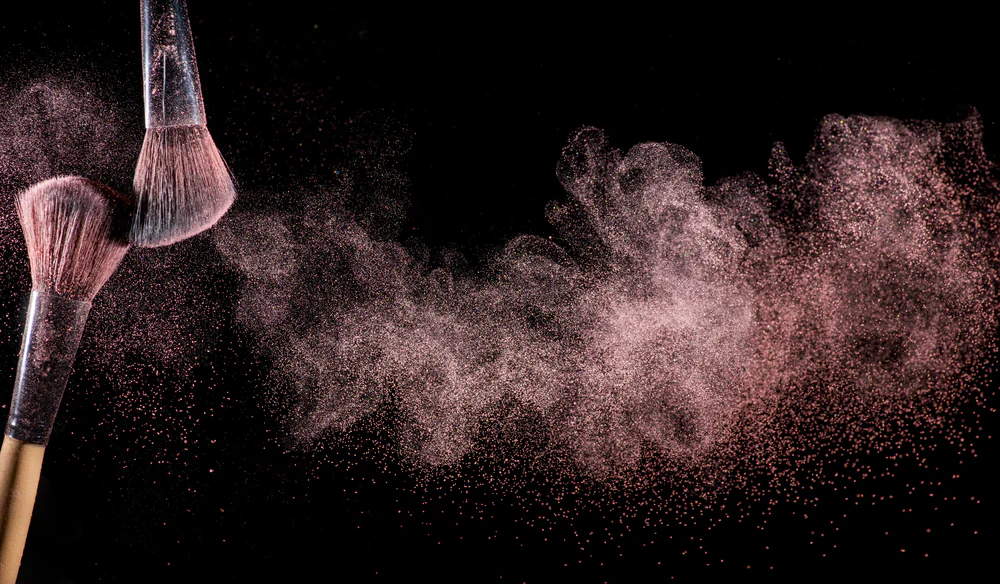
General Face Brushes:
Powder Brush:
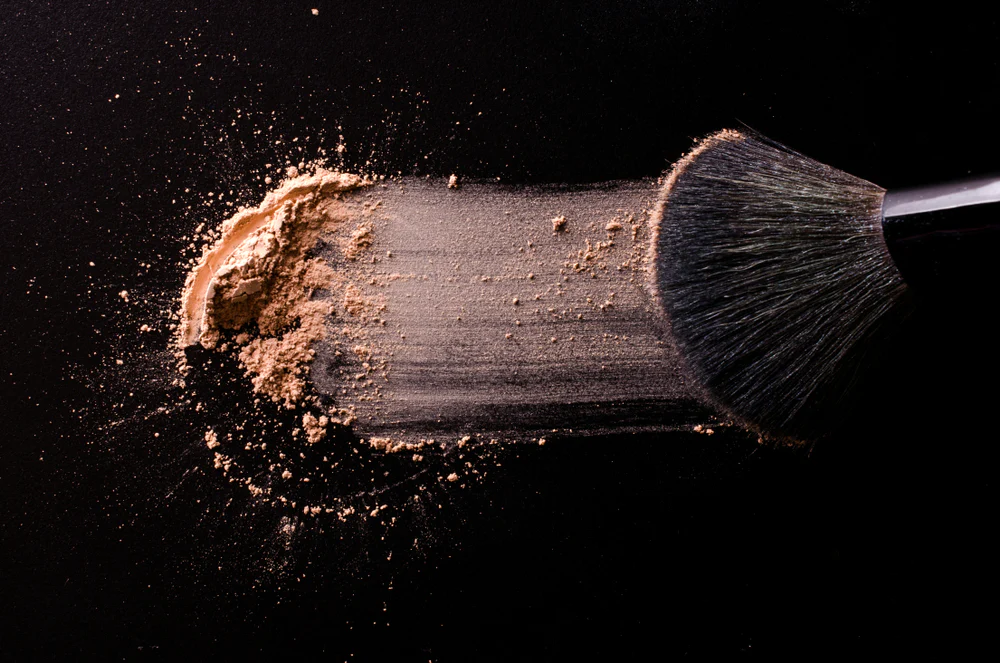
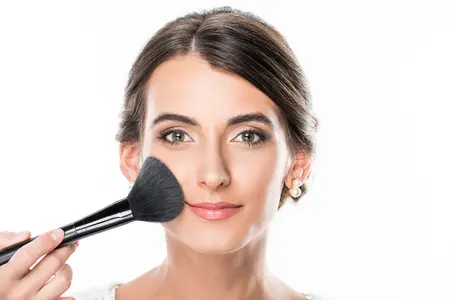
The Powder Brush, a fundamental component of every makeup collection, takes center stage in achieving a seamless finish. With its large, fluffy bristles, this brush is designed to gracefully apply loose or pressed powders. Dive into the intricacies of powder application, exploring techniques for setting makeup and achieving an airbrushed glow.
Using a powder brush effectively can make a significant difference in your makeup application. Here are some tips and usage recommendations for powder brushes:
Choose the Right Brush:
Select a powder brush based on your intended use. Larger, fluffy brushes are great for setting foundation with loose or pressed powder, while smaller, denser brushes work well for targeted application of bronzer, blush, or highlighter.
Prep Your Skin:
Before applying powder, ensure your skin is clean and well-moisturized. Applying powder on dry or flaky skin can accentuate imperfections.
Pick Up the Right Amount of Product:
Gently swirl or tap the brush into the powder product. Excess powder can lead to a cakey finish, so start with a small amount and build up as needed.
Setting Foundation:
Use a large, fluffy powder brush to set your liquid or cream foundation. Lightly dust translucent or tinted powder over your face to set the foundation and reduce shine. Focus on the T-zone if you have oily areas.
Bronzer Application:
For bronzer, choose a slightly smaller powder brush. Tap off any excess product and apply the bronzer in a “3” shape on each side of your face – starting from the forehead, sweeping down to the cheekbones, and then down to the jawline.
Blush Application:
A medium-sized powder brush is ideal for applying blush. Smile to locate the apples of your cheeks and apply the blush in a circular motion. Blend the color slightly upward towards your temples for a natural finish.
Highlighter Application:
Use a smaller, tapered powder brush for highlighter. Apply it to the high points of your face, such as the tops of your cheekbones, the bridge of your nose, and the cupid’s bow.
Blend with Light Strokes:
Whether setting your foundation or applying color, use light and feathery strokes to avoid disrupting the base makeup. This ensures a seamless and natural finish.
Clean Your Brush Regularly:
Clean your powder brush regularly to prevent the buildup of product and bacteria. A clean brush not only ensures a more hygienic application but also maintains the integrity of the bristles.
Reshape the Brush After Cleaning:
After washing, reshape the bristles and allow the brush to air-dry completely. This helps maintain the brush’s shape and extends its lifespan.
Invest in Quality Brushes:
Consider investing in high-quality powder brushes made from natural or synthetic fibers. Quality brushes not only perform better but also last longer with proper care. Remember that makeup application is an art, and personal preferences may influence your techniques. These tips serve as a general guide, but feel free to experiment and adjust based on your unique features and desired makeup style.
Tapered Foundation Brush:
Precision meets perfection with the Tapered Foundation Brush. Explore its pointed tip designed for flawless blending of liquid or cream foundations. Uncover the art of achieving a seamlessly blended base that elegantly contours to the unique features of your face.
A tapered foundation brush is a versatile tool designed for precise and controlled application of liquid or cream foundation. Here’s how to use a tapered foundation brush effectively:
Prep Your Skin:
Start with a clean and moisturized face. Applying foundation on well-hydrated skin ensures a smoother finish. Select the Right Foundation:
Tapered foundation brushes work well with liquid or cream foundations. Choose a foundation formula that suits your skin type and desired coverage.
Dispense the Foundation:
Pump a small amount of foundation onto the back of your hand or a palette. This makes it easier to control the amount of product you pick up with the brush.
Dip the Brush:
Dip the tapered brush into the foundation on your hand or palette. You only need a small amount, as tapered brushes are designed for precise application, allowing you to build coverage gradually.
Start in the Center:
Begin applying foundation in the center of your face, such as the forehead, nose, and cheeks. The tapered shape of the brush allows for precise application around the contours of your face.
Blend Outward:
Using light strokes, blend the foundation outward toward your hairline and jawline. The tapered tip of the brush is particularly useful for getting into the corners of the eyes, around the nose, and along the jaw.
Feathering Technique:
To avoid streaks and ensure a natural finish, use a feathering technique. Lightly sweep the brush over your skin in short, feathery strokes rather than dragging or pressing too hard.
Build Coverage Gradually:
Tapered foundation brushes are great for building coverage in areas where you need it most. If you prefer a lighter coverage, you can use the brush to sheer out the foundation by applying less product.
Blend into the Jawline and Neck:
To avoid a visible line of demarcation, blend the foundation down your jawline and slightly onto your neck. This ensures a seamless transition between your face and neck, creating a more natural look.
Concealer Application:
The tapered shape also makes the brush suitable for applying concealer in hard-to-reach areas, such as the inner corners of the eyes or around the nose.
Clean the Brush Regularly:
Clean your tapered foundation brush regularly to prevent product buildup and maintain the brush’s performance. Use a gentle brush cleanser or mild soap and allow it to air-dry thoroughly. A tapered foundation brush is a valuable tool for achieving a flawless foundation application with precision and control. Experiment with different techniques to find what works best for your unique facial features and desired makeup style.
Stippling Brush:
The Stippling Brush, adorned with duo-fiber bristles, is the virtuoso of achieving an airbrushed complexion. Venture into the realm of stippling, a technique that imparts a natural, diffused finish when working with liquid or cream products. Master the gentle tapping motion that transforms your makeup routine.
A stippling brush is a unique makeup tool with dual-length bristles that is specifically designed for achieving an airbrushed and natural finish. This brush is commonly used with liquid or cream products, such as foundation, blush, and highlighter. Here’s how to use a stippling brush effectively:
Choose the Right Stippling Brush:
Stippling brushes come in various sizes and bristle densities. A larger brush is suitable for foundation application, while smaller brushes can be used for more targeted application of blush or highlighter.
Prep Your Skin:
Start with a clean and moisturized face. Applying makeup on well-hydrated skin ensures a smoother and more even application.
Dispense Product:
For foundation application, dispense a small amount of liquid or cream foundation on the back of your hand or a palette. This allows you to control the amount of product and helps prevent waste.
Dip the Brush:
Gently dip the tips of the stippling brush into the product. Avoid pressing too hard to prevent product absorption into the bristles.
Apply in Dabbing Motions:
Using a stippling motion, dab the brush onto your skin. This technique involves lightly tapping the brush onto your face rather than dragging it. The dual-length bristles help create a diffused and blended effect.
Build Coverage Gradually:
Stippling brushes are excellent for achieving buildable coverage. If you prefer a lighter application, start with a small amount of product and gradually add more until you achieve your desired coverage.
Blend Along the Contours:
Use the stippling brush to blend the foundation along the contours of your face, including the jawline, hairline, and around the nose. The stippling motion helps prevent streaks and ensures an even application.
Apply Blush or Highlighter:
Stippling brushes can also be used for applying cream blush or liquid highlighter. Follow the same stippling technique, dabbing the brush onto the desired areas for a natural and blended look.
Clean the Brush Regularly:
Regularly clean your stippling brush to prevent product buildup and maintain its performance. Use a gentle brush cleanser or mild soap, and allow it to air-dry thoroughly.
Experiment with Angles:
Depending on the area you’re applying makeup, experiment with the angle of the stippling brush. Holding it at a slight angle can help you reach different contours of your face more effectively.
Use with Powder Products:
While stippling brushes are primarily designed for liquid and cream products, they can also be used with powder products for a softer and more diffused application. By incorporating a stippling brush into your makeup routine, you can achieve a natural and airbrushed finish with ease. Experiment with different products and techniques to find the application method that works best for your preferences and the look you want to achieve.
Kabuki Brush:
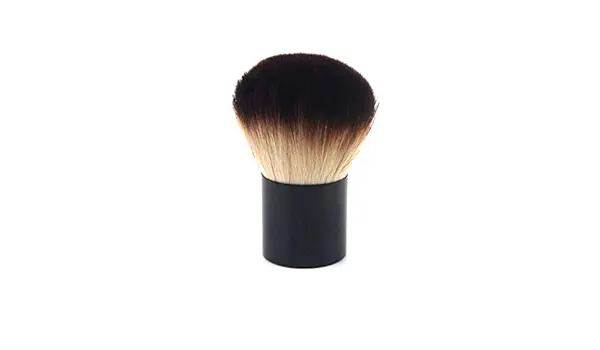
Characterized by densely packed, rounded bristles, the Kabuki Brush emerges as a multitasking marvel. Delve into its versatility, excelling in the application of powders while seamlessly transitioning to liquid and cream products. Discover the transformative power of this iconic brush in achieving a flawlessly blended finish.
A kabuki brush is a dense, short-bristled makeup brush with a wide, rounded shape. It is a versatile tool that can be used for various makeup applications, including powder, bronzer, blush, and foundation. Here’s how to use a kabuki brush effectively:
Powder Application:
Kabuki brushes are excellent for applying loose or pressed powder to set your makeup. Swirl the brush in the powder, tap off any excess, and then gently buff the powder onto your face using circular motions. This helps to achieve a smooth and even finish.
Bronzer Application:
To apply bronzer, dip the kabuki brush into the product, tap off excess, and then sweep the brush over areas where the sun naturally hits your face, such as the top of your forehead, cheekbones, and the bridge of your nose. The dense bristles provide a diffused and blended application.
Blush Application:
For blush, pick up a small amount of product with the kabuki brush and apply it to the apples of your cheeks. Blend the color outward toward your temples for a natural flush. The dense bristles help control the intensity of the color.
Foundation Application:
Kabuki brushes are also suitable for applying liquid or cream foundation. Pump a small amount of foundation onto the back of your hand, dip the brush into the product, and then buff the foundation onto your face using circular or stippling motions. The dense bristles provide a flawless and airbrushed finish.
Mineral Makeup:
Kabuki brushes are popular for applying mineral makeup. Swirl the brush in the loose mineral powder and then buff it onto your skin for a natural and buildable coverage.
Blend Contour and Highlight:
Kabuki brushes can be used to blend contour and highlight products. After applying these products, use the brush to blend the edges seamlessly for a well-blended and natural look.
Clean the Brush Regularly:
To maintain the performance of your kabuki brush, clean it regularly. Use a gentle brush cleanser or mild soap, and allow it to air-dry thoroughly. Clean brushes not only perform better but also help prevent skin irritation and breakouts.
Travel-Friendly:
Kabuki brushes are often compact and travel-friendly. Their short handle and dense bristles make them easy to carry in your makeup bag for touch-ups on the go.
Experiment with Pressure:
Adjust the pressure you apply to the brush based on the desired intensity of the makeup application. Light pressure provides a sheer application, while firmer pressure can build up color and coverage.
Use Different Brushes for Different Products:
While a kabuki brush is versatile, consider having separate brushes for different types of products to avoid color transfer and ensure optimal performance. By incorporating a kabuki brush into your makeup routine, you can achieve a flawless and professional-looking finish for various makeup applications. Experiment with different techniques to find the method that works best for your preferences and desired makeup style.
Contour Brush:
The Contour Brush, a sculptor’s chisel in the world of makeup, is tailored for precisely defining and enhancing facial features. Navigate through the dimensions it brings to the canvas, from applying contour powder to bronzer. Master the art of controlled application for adding depth and dimension.
A contour brush is a makeup tool designed specifically for sculpting and defining the face by accentuating the natural contours. Here’s how to use a contour brush effectively:
Choose the Right Contour Brush:
Contour brushes come in various shapes and sizes. Look for a brush with a slanted or angled head, as this design helps in precise application and blending.
Select the Right Contour Product:
Contour products can be cream, powder, or stick formulations. Choose a contour product that complements your skin tone and the overall makeup look you’re going for.
Identify Contour Areas:
Know the areas of your face where contouring is typically applied. These areas include the hollows of the cheeks, along the jawline, the sides of the nose, and the perimeter of the forehead.
Dip the Brush:
If you’re using a powder contour product, dip the contour brush into the product and tap off any excess to avoid applying too much at once.
Define Cheekbones:
To define the cheekbones, suck in your cheeks to locate the hollows. Use the contour brush to apply the product in the hollows, starting from the top of the ear and blending towards the corner of the mouth. Blend well to avoid harsh lines.
Define Jawline:
Apply contour along the jawline to add definition. This can help create the illusion of a more sculpted and defined jaw.
Nose Contour:
If you want to contour your nose, use the contour brush to apply product along the sides of the nose. Be subtle with the application and blend well for a natural look.
Forehead Contour:
Contouring the forehead can create the appearance of a more balanced face. Apply contour along the hairline and blend it towards the center of the forehead.
Blend, Blend, Blend:
The key to successful contouring is blending. Use the contour brush to blend the product thoroughly to avoid harsh lines. A well-blended contour should seamlessly enhance your natural features.
Choose the Right Shade:
Contour products often come in different shades, including cool and warm tones. Cool-toned contours are ideal for creating shadows, while warm-toned contours can add warmth and a sun-kissed look.
Cream Contour Application:
If you’re using a cream contour product, apply small dots or lines of the product on the contour areas and blend using the contour brush. Cream contours can provide a more seamless and natural finish when properly blended.
Highlight After Contouring:
After contouring, you may want to highlight certain areas to enhance the effect. Apply a lighter product on the high points of your face, such as the tops of your cheekbones, the bridge of your nose, and your cupid’s bow. Remember that less is often more with contouring. It’s easier to add more product if needed than to remove excess. Practice and experiment with the intensity and placement of contour to find what works best for your face shape and makeup preferences.
Silicone Blender:
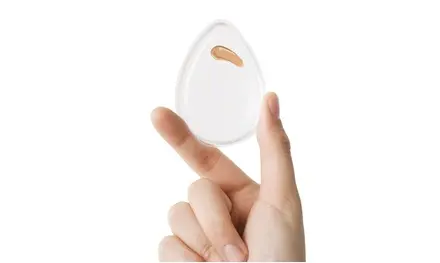
Modernizing makeup application, the Silicone Blender introduces a non-absorbent alternative to traditional sponges. Explore its smooth surface, minimizing product wastage and providing an ideal canvas for liquid and cream formulations. Embrace the ease of cleaning and maintaining this innovative addition to your beauty repertoire.
A silicone blender, often referred to as a silicone makeup sponge or applicator, is a unique tool designed for applying and blending liquid or cream makeup products. Here’s how to use a silicone blender effectively:
Apply Liquid or Cream Products:
The silicone blender is best used with liquid foundation, cream blush, or cream contour products. Apply small dots or lines of the product directly onto your face or the silicone blender itself.
Spread the Product:
Use the flat side of the silicone blender to spread the product across your face. The non-absorbent silicone surface prevents the tool from soaking up excess product, ensuring more efficient use of your makeup.
Blend with Patting Motion:
Instead of traditional rubbing or sweeping motions, use a gentle patting or pressing motion to blend the makeup into your skin. The flexibility of the silicone allows for a smooth and even application.
Edge for Precision:
Use the edge or tip of the silicone blender for more precise application around the eyes, nose, and other smaller areas. This is especially useful for applying concealer or intricate detailing.
Build Up Coverage Gradually:
If you prefer a higher coverage, layer the product gradually. The silicone blender allows you to build up coverage without absorbing excess product, unlike traditional makeup sponges.
Clean with Ease:
One advantage of silicone blenders is that they are easy to clean. Simply wipe the surface with a makeup wipe or a damp cloth to remove any leftover product. This makes them a hygienic option for makeup application.
Apply Cream Contour or Blush:
Silicone blenders work well with cream contour and blush products. Apply the product to the desired areas and use the silicone blender to blend and diffuse the color for a seamless finish.
Use with Skincare Products:
Silicone blenders can also be used with skincare products such as serums or moisturizers. Apply a small amount of the product and use the silicone blender to evenly distribute and massage it into your skin.
Experiment with Techniques:
Since silicone blenders have a different texture than traditional makeup sponges or brushes, experiment with different techniques to find what works best for you. Some people prefer a gentle pressing motion, while others might prefer a slight sweeping motion.
Apply Liquid Highlighter:
The silicone blender is suitable for applying liquid highlighter. Dot the highlighter on the high points of your face and use the blender to blend and diffuse for a natural glow.
Store and Carry Easily:
Silicone blenders are typically compact and easy to store. They are also convenient for travel as they are less likely to get damaged compared to some traditional makeup sponges. Remember that personal preferences play a significant role in makeup application, so feel free to experiment and adapt techniques to suit your style and achieve the desired finish with a silicone blender.
Beauty Blender:
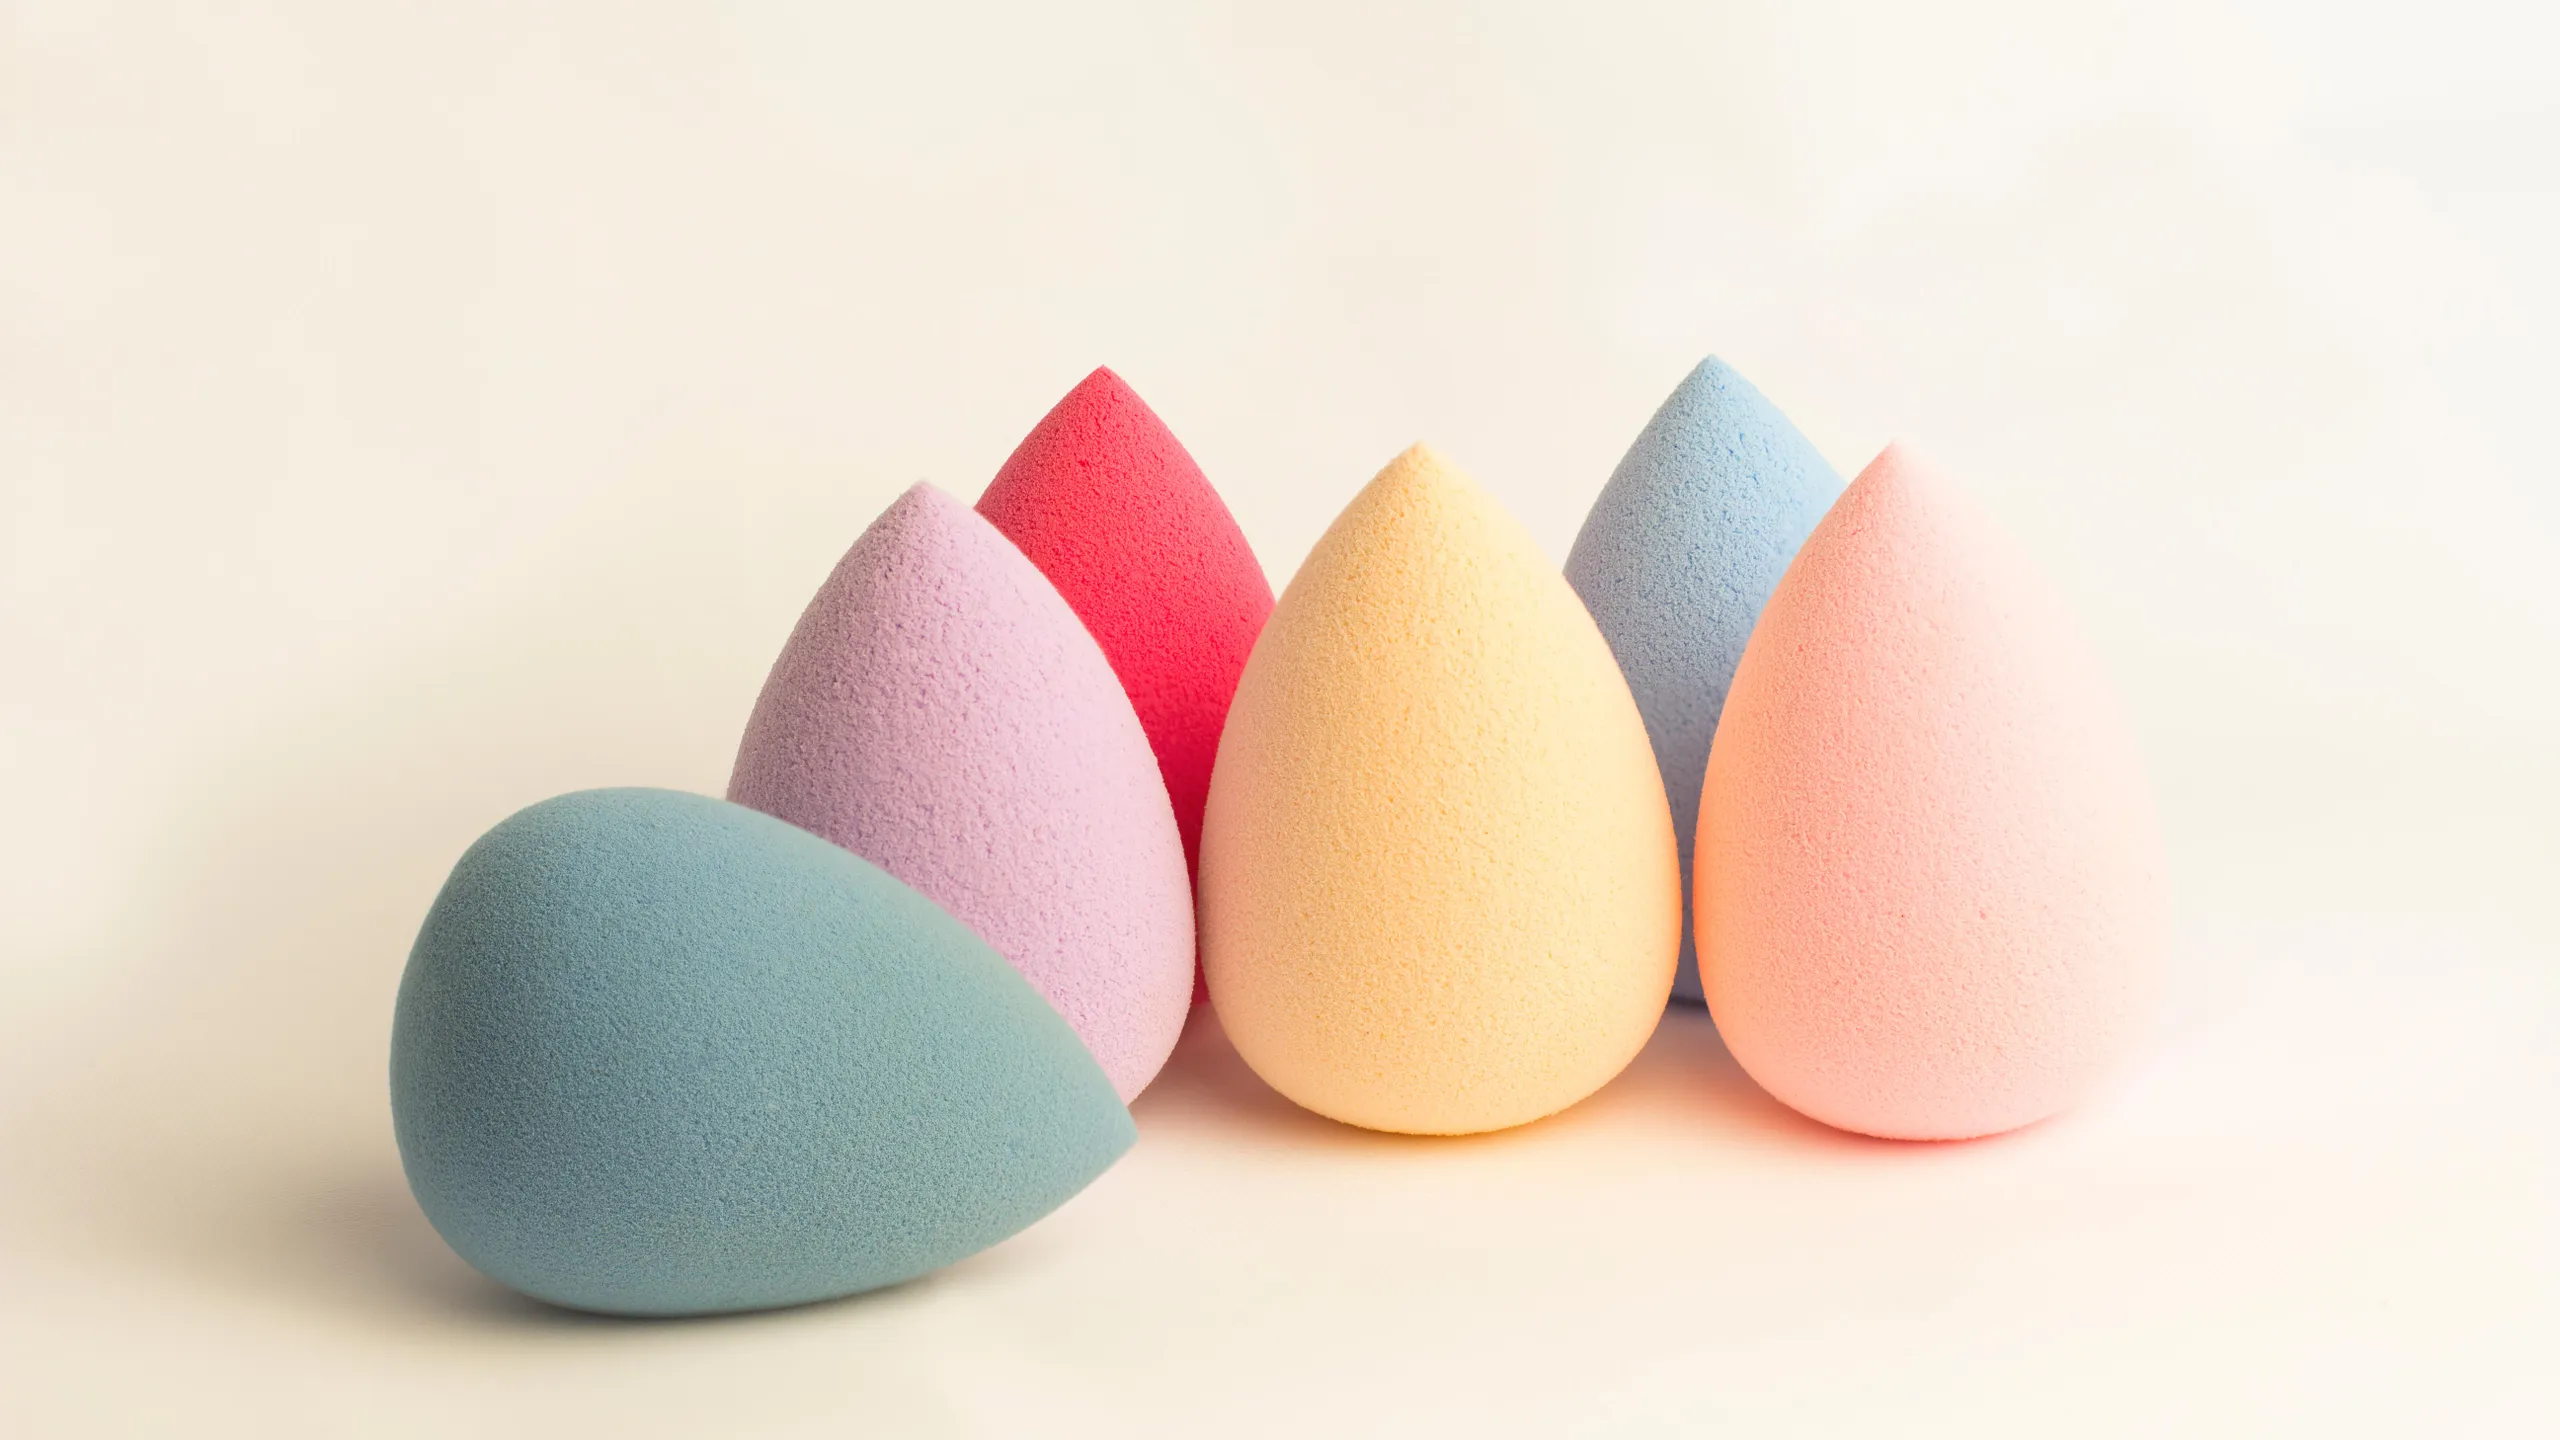
The iconic Beauty Blender, a teardrop-shaped sponge, has become synonymous with flawless makeup application. Dive into the unique bouncing technique that ensures a streak-free and natural finish. Discover its versatility in applying foundation, concealer, or cream blush, making it an essential tool in every artist’s toolkit.
A Beauty Blender, or makeup sponge, is a versatile tool used for applying and blending various makeup products. Here’s a step-by-step guide on how to use a Beauty Blender effectively:
Dampen the Beauty Blender:
Before use, dampen the Beauty Blender under running water or soak it in a bowl of water. Squeeze out any excess water, leaving the sponge slightly damp. This helps prevent the sponge from absorbing too much product and ensures a smoother application.
Apply Liquid or Cream Product:
Dot or apply your liquid foundation, concealer, or cream product directly onto your face or the back of your hand. Alternatively, you can apply the product directly onto the dampened Beauty Blender.
Bounce and Blend:
Use a bouncing or stippling motion to blend the product into your skin. Gently press the rounded side of the Beauty Blender onto your face, bouncing it to blend the makeup. This technique provides an airbrushed finish and prevents streaks or lines.
Rotate for Precision:
For more precise application, use the pointed end or the edge of the Beauty Blender. This is particularly useful for blending concealer under the eyes, around the nose, and in other smaller areas.
Build Up Coverage Gradually:
If you desire more coverage, layer the product gradually. The Beauty Blender allows you to build coverage without looking cakey, giving you a natural and flawless finish.
Blend Foundation into the Hairline and Jawline:
Make sure to blend the foundation into your hairline, jawline, and neck to avoid any noticeable lines of demarcation. The Beauty Blender’s soft texture ensures a seamless blend between your makeup and natural skin.
Apply Cream Blush or Contour:
The Beauty Blender can be used to apply and blend cream blush, contour, or highlighter. Apply the product with the pointed end and blend using the bouncing motion for a natural flush or sculpted look.
Set with Powder:
After applying liquid or cream products, you can use the Beauty Blender to set your makeup with loose or pressed powder. Gently press the sponge onto the powdered product and then onto your face for a soft and blended finish.
Clean Regularly:
Clean your Beauty Blender regularly to prevent the buildup of product and bacteria. You can use a gentle brush cleanser or mild soap. Wet the sponge, apply the cleanser, and gently lather before rinsing thoroughly.
Store Properly:
Allow your Beauty Blender to air-dry completely after each use. Avoid leaving it in a closed or damp environment, as this can encourage the growth of bacteria. You can store it in a well-ventilated area or use the original packaging for air circulation. Using a Beauty Blender efficiently involves mastering the bouncing and stippling motion, adjusting the pressure based on the desired coverage, and incorporating it into your overall makeup routine for a flawless finish.
Fan Brush:
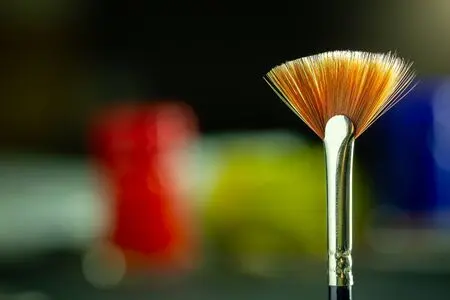
The delicate Fan Brush, with its thin, fanned-out bristles, takes center stage in subtle applications. Explore its role in highlighting, sweeping away excess powder, or adding a delicate touch of blush. Immerse yourself in the feather-light finish it imparts to your makeup masterpiece.
A fan brush is a unique makeup tool with flat, fanned-out bristles, typically used for applying and sweeping away powdered products. Here’s how to use a fan brush effectively:
Highlighter Application:
One of the most popular uses of a fan brush is for applying highlighter. Dip the tips of the fan brush into your favorite highlighter, tap off excess product, and lightly sweep the brush over the high points of your face. These areas typically include the tops of your cheekbones, the bridge of your nose, the cupid’s bow, and the brow bone. The fan brush provides a soft and diffused application of the highlighter.
Blush Application:
Fan brushes can be used to apply blush, especially if you want a sheer and natural look. Pick up a small amount of blush with the tips of the fan brush, tap off excess, and lightly sweep it across the apples of your cheeks.
Bronzer Application:
For a subtle bronzed effect, use the fan brush to apply bronzer. Sweep the brush along the areas where the sun naturally hits your face, such as the top of the forehead, cheekbones, and jawline. The fan brush provides a feather-light application, perfect for a sun-kissed look.
Contour Blending:
While fan brushes are not the primary choice for contouring, they can be used to blend and soften the edges of contour products. After applying contour with another brush, use the fan brush to blend the contour lines for a more seamless finish.
Setting Powder:
Fan brushes are excellent for applying a light dusting of setting powder. Dip the tips of the fan brush into translucent powder, tap off excess, and gently sweep it across your face. This helps set your makeup without adding too much product.
Eyeshadow Cleanup:
If you experience fallout while applying eyeshadow, use a fan brush to sweep away excess powder without disturbing the rest of your makeup. The wide shape of the fan brush makes it an efficient cleanup tool.
Brow Bone Highligh:
Use the fan brush to apply a subtle highlight to your brow bone. This adds a touch of brightness to your eyes and enhances your eye makeup look.
Remove Excess Product:
If you accidentally apply too much blush, bronzer, or highlighter, you can use the fan brush to gently sweep away excess product. This helps tone down the intensity of the makeup.
Cleaning the Brush:
Fan brushes are easy to clean. You can wipe the bristles with a brush cleaner or a gentle cleanser. Be sure to let it air-dry thoroughly before the next use.
Experiment with Different Angles:
Depending on the look you’re going for, you can experiment with different angles of the fan brush. Holding it horizontally provides a softer application, while holding it vertically can offer more precision. A fan brush is a versatile tool that adds a light and airy touch to your makeup application. Its unique shape makes it especially useful for achieving a soft and diffused look with powdered products.
Blush Brush:
Crafted for the precise application of blush to the apples of the cheeks, the Blush Brush features soft, rounded bristles. Dive into its shape that allows seamless blending, ensuring a natural flush that enhances your overall complexion. Uncover the nuances of creating rosy radiance with this essential brush.
A blush brush is a makeup tool designed specifically for the application of blush to the cheeks. Here’s how to use a blush brush effectively:
Choose the Right Brush:
Select a blush brush that is medium-sized with soft, fluffy bristles. The shape can vary, but a brush with a slightly domed or angled shape is commonly used for applying blush.
Pick the Right Blush Shade:
Choose a blush shade that complements your skin tone and the overall makeup look you’re going for. Common blush shades include pinks, peaches, corals, and mauves.
Tap off Excess Product:
After picking up blush with the brush, tap off any excess product. This helps prevent applying too much blush at once and allows for better control over the intensity of the color.
Locate the Apples of Your Cheeks:
Smile to locate the apples of your cheeks. This is where you’ll typically apply blush for a natural, flushed look.
Apply in a Soft, Circular Motion:
Using gentle, circular motions, apply the blush to the apples of your cheeks. Start with a light application and build up the color gradually until you achieve the desired intensity. Blending is key for a seamless finish.
Blend Toward Temples:
Blend the blush slightly upward and outward towards your temples. This technique provides a lifted appearance and ensures the color is well-diffused.
Adjust Placement Based on Face Shape:
Consider your face shape when applying blush. For round faces, focus on the apples and blend outward. For longer faces, apply blush a bit higher on the apples and blend horizontally to create width.
Use a Light Hand:
Blush can be built up, but it’s easier to add more than to remove excess. Start with a light hand, especially if the blush is highly pigmented, and layer as needed.
Coordinate with Other Makeup:
Consider how your blush complements other makeup elements. For example, if you’re wearing bold eyeshadow or lips, you might opt for a more subdued blush shade.
Clean Your Brush Regularly:
Clean your blush brush regularly to prevent color buildup and ensure the bristles remain soft. Use a gentle brush cleanser or mild soap and allow it to air-dry thoroughly.
Matte vs. Shimmer Blush:
Choose between matte and shimmer blush based on your preference and the occasion. Matte blushes provide a natural finish, while shimmer blushes add a luminous glow.
Coordinate with Skin Undertones:
Consider your skin undertones when choosing blush shades. Warmer tones often pair well with peach and coral shades, while cooler tones can complement pinks and mauves. Remember that blush can add a healthy, radiant glow to your complexion, and the right application technique enhances your overall makeup look. Adjust the amount and placement of blush based on your facial features and personal preferences.
Eye Area Brushes:
Angled Eye Shadow Brush:
Precision meets creativity with the Angled Eye Shadow Brush, perfect for defining the crease or applying eyeshadow along the lash line. Explore the angled bristles that allow for controlled and precise application, adding depth and dimension to your eye makeup looks. An angled eyeshadow brush, also known as an angled shader or contour brush, is a versatile tool designed for precise eyeshadow application and blending. Here’s how to use an angled eyeshadow brush effectively:
Select the Right Brush:
Choose an angled eyeshadow brush with soft, densely packed bristles. The angle of the brush allows for easy access to the crease and outer corner of the eye.
Pick Eyeshadow Shades:
Select the eyeshadow shades you want to use for your eye look. An angled brush is excellent for applying color to specific areas and creating defined lines.
Define the Crease:
Dip the angled brush into your chosen eyeshadow color and tap off any excess. Use the brush to define and add depth to the crease of your eyelid. The angle of the brush allows for precise placement and blending in the crease.
Outer Corner Definition:
Extend the eyeshadow from the crease to the outer corner of your eye, creating a “V” shape. The angled brush makes it easier to create a defined and lifted outer corner.
Smudge and Blend Eyeliner:
An angled eyeshadow brush is great for smudging and blending eyeliner. Dip the brush into a dark eyeshadow color and gently smudge and blend the eyeliner along the lash line for a softer and more diffused look.
Highlight the Brow Bone:
Use a lighter eyeshadow shade or a highlighter and apply it to the brow bone using the tip of the angled brush. This adds a lifted and highlighted effect to the eyes.
Inner Corner Highlight:
Apply a bright or shimmery eyeshadow to the inner corner of the eye using the tip of the angled brush. This technique opens up the eyes and adds a touch of brightness.
Double-Ended Brushes:
Some angled eyeshadow brushes come with a second, smaller brush on the other end. This smaller brush is often angled or pointed and can be used for more detailed work, such as precise crease definition or lower lash line application.
Clean Brush for Multicolor Looks:
If you’re using multiple eyeshadow colors, clean the brush between colors by gently wiping it on a clean tissue or using a brush cleaner. This ensures that the colors don’t mix and maintains the integrity of each shade.
Soft Cut Crease:
Achieve a soft cut crease by using the angled brush to define the crease with a darker shade and then blending it gently for a seamless transition.
Experiment with Techniques:
Angle and pressure matter. Experiment with the angle of the brush and the amount of pressure you apply to achieve different effects. A steeper angle may create a more defined line, while a softer angle can provide a diffused look.
Clean and Maintain:
Regularly clean your angled eyeshadow brush to remove any accumulated eyeshadow and bacteria. This helps maintain the brush’s performance and ensures a smoother application.
Using an angled eyeshadow brush allows you to create precise and well-defined eye makeup looks. Whether you’re aiming for a subtle everyday look or a more dramatic effect, the angled brush is a valuable tool for achieving beautiful eye makeup results.
Eye Shadow Crease Brush:
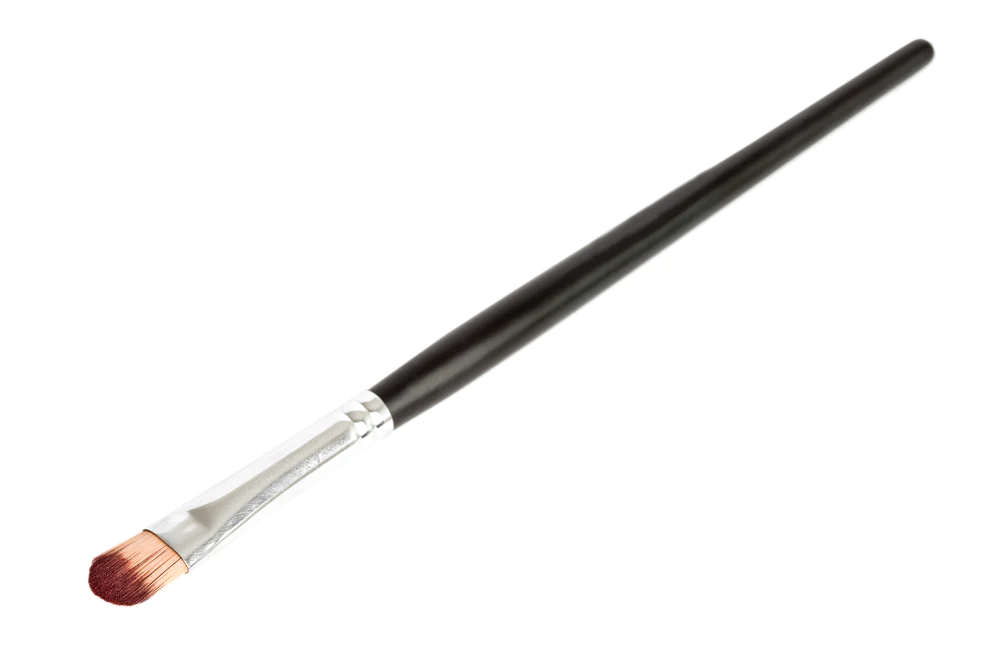
The Eye Shadow Crease Brush, boasting tapered and dome-shaped bristles, becomes the maestro in creating dimension in the eye crease. Immerse yourself in the techniques of blending and adding depth to eyeshadow looks. Uncover the art of achieving mesmerizing eyes with this specialized brush. An eyeshadow crease brush is a specialized tool designed to define and blend eyeshadow in the crease of your eyelid. It typically has a tapered or dome shape, making it ideal for precise application and blending in the crease area. Here’s how to use an eyeshadow crease brush effectively:
Select the Right Brush:
Choose an eyeshadow crease brush with soft, tapered bristles. The tapered shape allows for easy maneuvering in the crease and provides more control over the application.
Choose Eyeshadow Colors:
Select the eyeshadow colors you want to use for your eye look. For crease work, you may want to choose a shade that is a few shades darker than your lid color for definition.
Dip into Eyeshadow:
Dip the tip of the crease brush into your chosen eyeshadow color. Tap off any excess to avoid fallout and ensure a controlled application.
Locate the Crease:
Identify the natural crease of your eyelid. If you have hooded eyes or want to create the illusion of a deeper crease, you can apply the eyeshadow slightly above the natural crease.
Apply Eyeshadow to the Crease:
Using the crease brush, apply the eyeshadow to the crease in a back-and-forth or windshield wiper motion. Start from the outer corner and work your way toward the inner corner. This technique adds depth and dimension to the eyes.
Build Up Color Gradually:
Start with a small amount of eyeshadow and build up the color gradually. This approach allows you to control the intensity of the eyeshadow and ensures a seamless blend.
Blend the Edges:
After applying eyeshadow to the crease, use the crease brush to blend the edges for a smooth transition between the eyeshadow and your skin. Circular or back-and-forth blending motions can be effective.
Layer Multiple Colors:
If you’re using multiple eyeshadow colors, layer them in the crease to create a gradient effect. Use a lighter transition shade above the crease for a seamless blend.
Highlight the Brow Bone:
You can use the crease brush to apply a matte or shimmery eyeshadow to highlight the brow bone. Sweep the highlight shade just below the eyebrow for a lifted and polished look.
Lower Lash Line Definition:
The crease brush can also be used to apply eyeshadow along the lower lash line. Use a lighter or coordinating shade for a soft and defined lower lash line.
Experiment with Angles:
Experiment with the angle and orientation of the crease brush to achieve different effects. Holding it horizontally provides a wider application, while holding it vertically can create a more defined line.
Clean and Maintain:
Regularly clean your crease brush to prevent color buildup and maintain its performance. Use a gentle brush cleanser or mild soap, and allow it to air-dry thoroughly.
Using an eyeshadow crease brush helps you achieve a professional-looking eye makeup application with precise crease definition and seamless blending. It’s a valuable tool for creating a variety of eye looks, from subtle to dramatic.
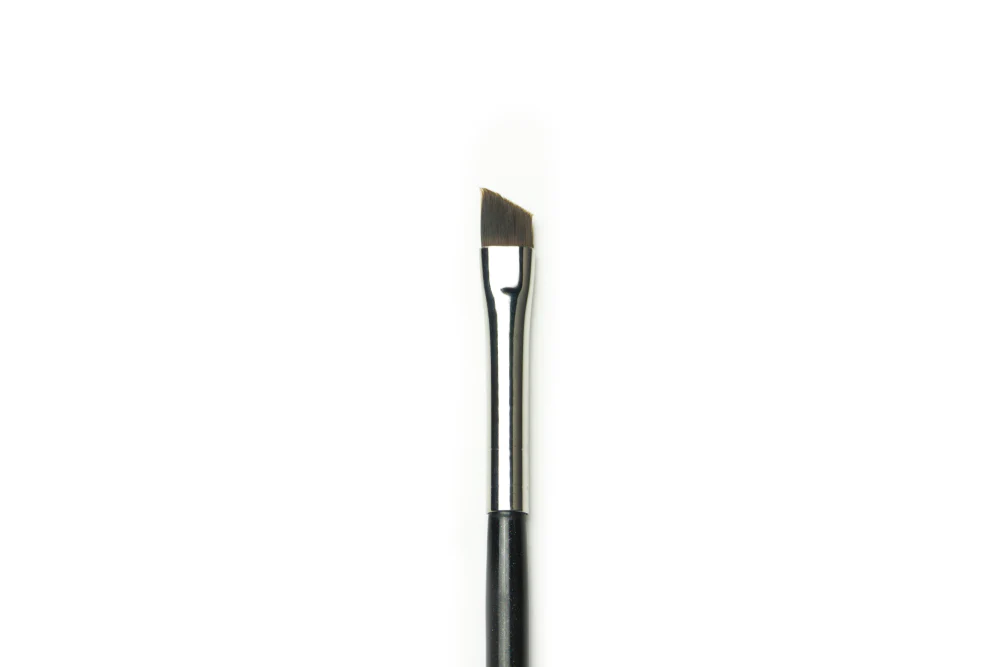
Eyeliner Brush:
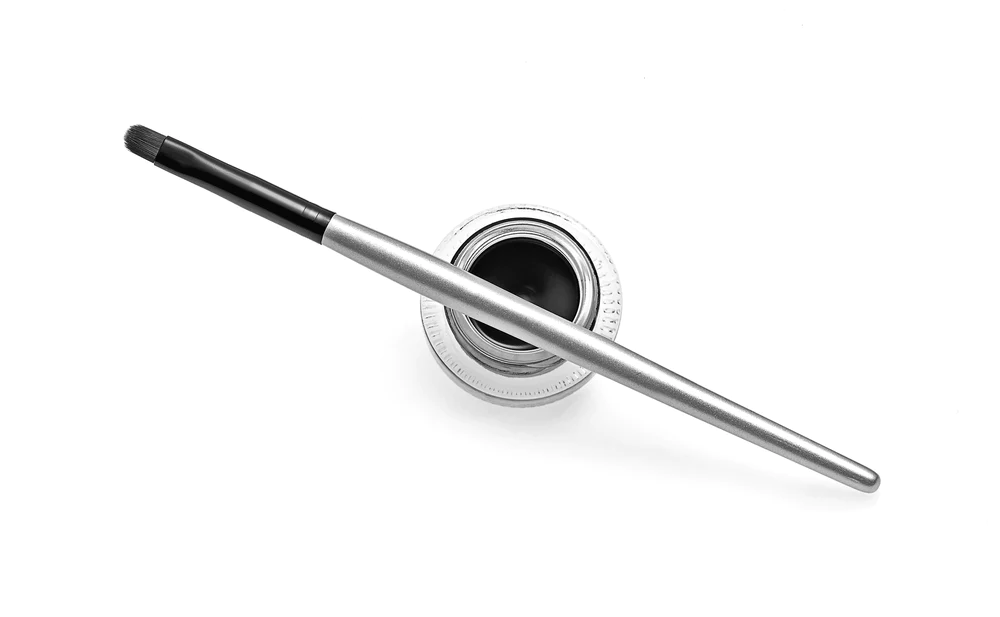
For those seeking defined and precise eyeliner application, the Eyeliner Brush takes the spotlight. Explore the fine, pointed bristles that make it the go-to tool for creating anything from subtle lines to bold cat-eyes. Master the art of eyeliner application with this essential brush.
An eyeliner brush is a small, thin, and precise tool designed for applying eyeliner with control and accuracy. Depending on the style of eyeliner you prefer, you can use different techniques with an eyeliner brush. Here’s how to use an eyeliner brush effectively:
Select the Right Brush:
Choose an eyeliner brush that suits the type of eyeliner product you’re using. There are different types of eyeliner brushes, such as angled, flat, or pointed brushes. Angled brushes are great for creating winged looks, flat brushes for gel liners, and pointed brushes for detailed work.
Choose Eyeliner Product:
Decide on the type of eyeliner you want to use. Eyeliner brushes work well with gel, cream, powder, and even some liquid eyeliners. Different eyeliner formulations can create varied finishes, from a soft smudged line to a bold, defined look.
Dip the Brush into Eyeliner:
If you’re using gel or cream eyeliner, dip the eyeliner brush into the product. Ensure you pick up a small amount of product to prevent clumps or uneven application.
Remove Excess Product:
If necessary, gently wipe off excess product on the back of your hand or on a tissue. This helps control the amount of product on the brush and ensures a smoother application.
Start from the Inner Corner:
Begin applying eyeliner from the inner corner of the eye, working your way outward. Keep the line close to the lash line for a natural look or gradually build thickness for a bolder appearance.
Winged Eyeliner (Optional):
For a winged eyeliner look, use an angled eyeliner brush to create the wing. Angle the brush from the outer corner of your eye toward the end of your eyebrow as a guide. Draw a line and connect it to the upper lash line, creating a winged effect. You can make the wing as subtle or as dramatic as you like.
Tightline or Waterline:
An eyeliner brush can also be used to apply eyeliner to the tightline (the area between your lashes) or waterline (the inner rim of your lower lash line). Be cautious when applying to the waterline to avoid irritation.
Fix Mistakes with Concealer:
If you make any mistakes or want to clean up the eyeliner, use a small, flat brush to apply concealer around the edges for a precise and polished look.
Powder Eyeliner:
If you’re using powder eyeshadow as eyeliner, dampen the eyeliner brush slightly before dipping it into the eyeshadow. This intensifies the color and helps the powder adhere better.
Experiment with Styles:
Experiment with different eyeliner styles, such as classic, winged, or smudged. The eyeliner brush provides the precision needed for various looks, so don’t be afraid to get creative.
Clean and Maintain:
Clean your eyeliner brush regularly to prevent product buildup and maintain its performance. Use a gentle brush cleanser or mild soap and allow it to air-dry thoroughly. Using an eyeliner brush allows for more control and precision in creating your desired eyeliner look. With practice, you can master different techniques and achieve a variety of eyeliner styles.
Brow Brush:
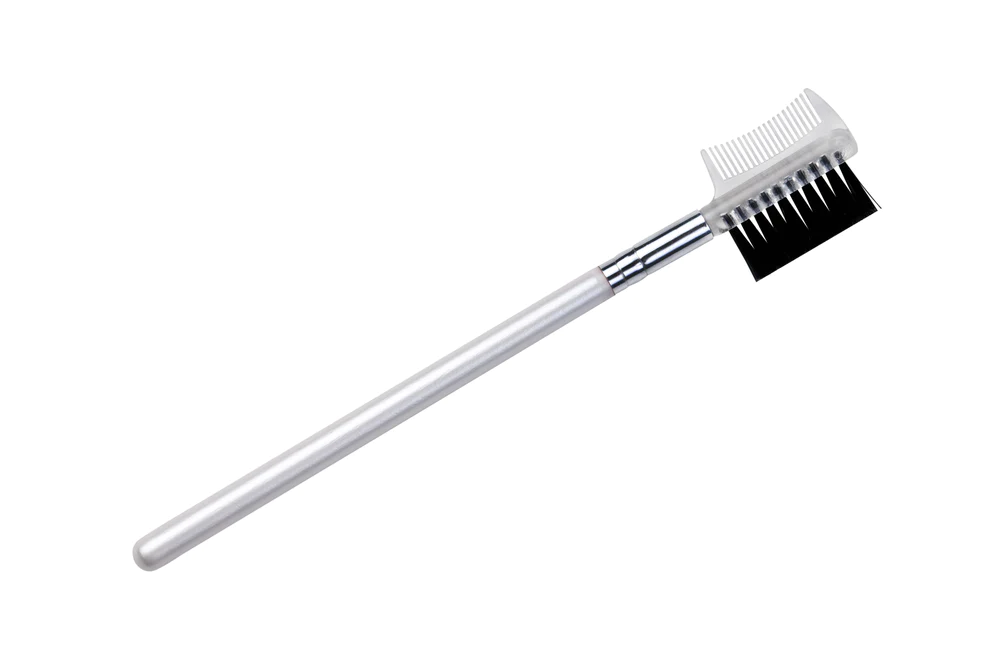
Similar to the Eye Brow Brush, the Brow Brush is tailored for defining and shaping eyebrows. With a spoolie on one end and a brush on the other, this versatile tool becomes essential for achieving groomed and well-defined brows. Delve into the dual functionality that elevates your brow game.
A brow brush is a versatile tool designed to groom, shape, and define your eyebrows. Depending on the style you prefer, brow brushes come in various shapes, such as spoolie brushes, angled brushes, or dual-ended brushes. Here’s how to use a brow brush effectively:
Choose the Right Brush:
Select a brow brush that suits your brow product and the style you want to achieve. Common types include spoolie brushes for blending and shaping, angled brushes for precise application, and dual-ended brushes with both a spoolie and an angled brush.
Brush Through Your Brows:
Start by using the spoolie end of the brush to comb through your eyebrows in the direction of hair growth. This helps separate the hairs and provides a clean canvas for brow product application.
Define the Shape:
Use the angled brush or another precise end to define the shape of your brows. Dip the brush into your preferred brow product—powder, pomade, pencil, or gel—and start by outlining the bottom of your eyebrows. Follow the natural arch and extend the tail if needed.
Fill in Sparse Areas:
Once the bottom is defined, use the brush to fill in any sparse areas by applying short, hair-like strokes in the direction of hair growth. This technique creates a natural and textured appearance.
Blend for a Natural Look:
After applying product, use the spoolie end again to blend and soften the color. This step helps distribute the product evenly and removes any harsh lines for a more natural look.
Set with Brow Gel (Optional):
If you want to set your brow hairs in place, use the spoolie to apply a clear or tinted brow gel. Comb through your brows in an upward motion to lift and set the hairs.
Trim Excess Brow Hairs (Optional):
If your eyebrows have long hairs that extend beyond the desired shape, use small scissors to trim them. Comb the hairs upward with the spoolie and carefully trim any excess length.
Create a Gradual Fade (Optional):
For a soft and natural-looking gradient, use a lighter hand with your brow product towards the front of the eyebrows. This creates a gradual fade, mimicking the natural variation in brow hair color.
Experiment with Techniques:
Brow brushes can be used in various ways depending on personal preference. Experiment with different techniques, such as straight-across brows, arched brows, or feathered brows, to find the style that suits you best.
Coordinate with Hair Color:
Choose a brow product that complements your natural hair color. If you have lighter hair, go for a shade slightly darker than your hair color, and if you have darker hair, opt for a shade slightly lighter for a softer look.
Clean and Maintain:
Regularly clean your brow brush to remove product buildup and ensure a precise application. Use a gentle brush cleanser or mild soap, and allow it to air-dry thoroughly. By incorporating a brow brush into your makeup routine, you can achieve well-groomed and defined eyebrows that enhance your overall look. The key is to practice and experiment with different products and techniques to find what works best for your brow shape and style preferences.
Mascara Wand:
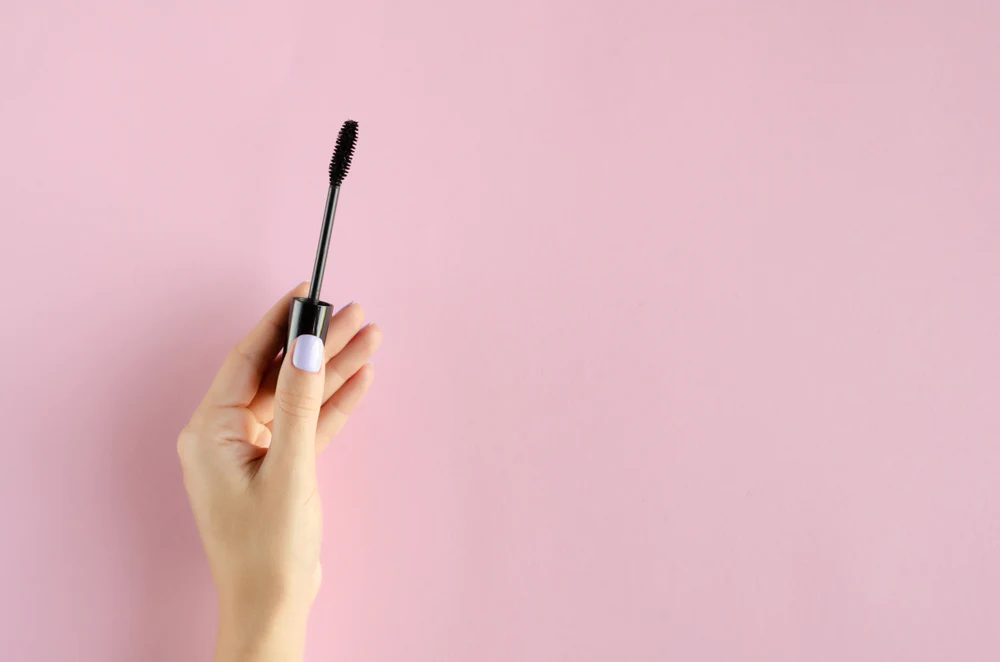
While not technically a brush, the Mascara Wand becomes integral in eye makeup application. Uncover its role in coating and separating eyelashes, providing length and volume to enhance your eye look. Explore the transformative effects that a well-defined mascara wand can bring to your lashes. Using a mascara wand correctly is crucial for achieving defined, voluminous, and clump-free lashes. Here’s a step-by-step guide on how to use a mascara wand effectively:
Choose the Right Mascara:
Select a mascara that suits your desired lash look. Different mascaras offer various effects, such as lengthening, volumizing, curling, or waterproof. Choose one that aligns with your preferences.
Check the Wand:
Before applying mascara, ensure that the mascara wand is clean and free of excess product. Wipe off any clumps or residue on a tissue to prevent clumpy application.
Curl Your Lashes (Optional):
For an extra lift, you can curl your lashes before applying mascara using an eyelash curler. This step is optional but can enhance the curling effect of the mascara.
Start at the Base:
Hold the mascara wand horizontally and start at the base of your lashes. Wiggle the wand slightly to coat the roots and ensure that each lash is covered with mascara.
Sweep Upwards:
Slowly sweep the wand upwards, following the natural curve of your lashes. Use a steady hand and a light touch to prevent clumping.
Wiggle for Volume:
To add volume, wiggle the mascara wand back and forth as you move it up the lashes. This helps separate and coat each lash individually for a fuller effect.
Focus on Outer and Inner Lashes:
Pay extra attention to the outer and inner corners of your eyes. Tilt the mascara wand vertically and use the tip to reach and coat the lashes in these areas.
Separate Lashes:
If you notice any clumps, use the tip of the mascara wand or a lash comb to separate the lashes. Comb through them gently to achieve a more defined and natural look.
Build Up Layers (Optional):
If you want more dramatic lashes, allow the first coat to dry slightly before applying additional layers. Be cautious not to overdo it, as too many layers can lead to clumping.
Bottom Lashes:
For your bottom lashes, use the tip of the wand to coat each lash individually. Be careful not to smudge the mascara onto the skin.
Clean Up Mistakes:
If you accidentally get mascara on your eyelid or under your eyes, wait for it to dry, then use a cotton swab or a clean brush to wipe it away without smearing.
Remove Excess Product:
Before reinserting the wand into the mascara tube, wipe off any excess product on the rim to prevent clumping and ensure a clean application next time.
Avoid Pumping the Wand:
Resist the urge to pump the mascara wand in and out of the tube. This can introduce air and dry out the mascara faster, leading to clumping and flaking.
Replace Mascara Regularly:
Mascara has a shelf life, and using old or dried-out mascara can lead to clumpy application and potential eye irritation. Replace your mascara every three to six months. By following these steps and taking your time during the application process, you can achieve beautifully defined and voluminous lashes with your mascara wand. Adjust the techniques based on your preferred lash style, whether it’s a natural everyday look or a more dramatic and bold appearance.
Lip Brushes:
Lip Brush:
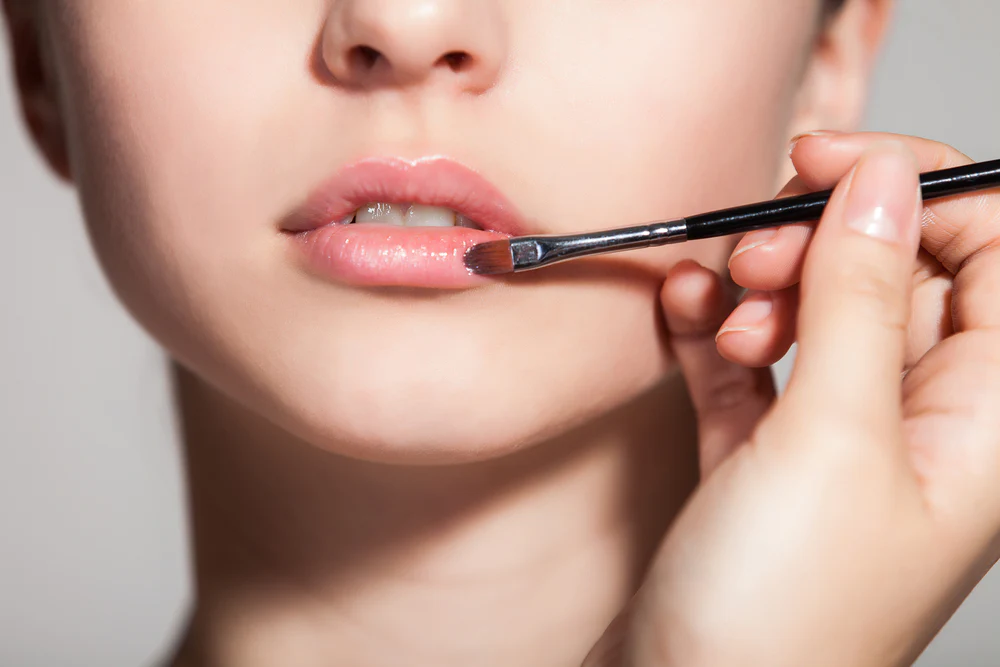
The Lip Brush emerges as a precision tool for applying lipstick or lip gloss with accuracy. Explore its fine, tapered bristles that allow for controlled application, defining the edges of the lips for a polished finish. Uncover the art of achieving perfectly sculpted lips with this essential brush.
A lip brush is a handy tool for precise and controlled application of lipstick or lip gloss. It allows you to define the edges of your lips, achieve a more polished look, and control the intensity of the color. Here’s a guide on how to use a lip brush effectively:
Select the Right Brush:
Choose a lip brush with soft, synthetic bristles that are firm enough to provide control but gentle on the lips. Lip brushes come in various shapes, including flat, pointed, and angled. Pick a shape that suits your preference for application.
Clean the Brush:
Before using the lip brush, make sure it’s clean. You can wash it with a mild brush cleanser or gentle soap and water. Allow it to dry completely before use.
Choose Your Lip Product:
Decide whether you want to use a lipstick, lip gloss, or a combination of both. Lip brushes are versatile and can work with various lip products.
Apply Lip Balm or Primer (Optional):
If your lips are dry, you can apply a thin layer of lip balm or primer to ensure a smooth application and longer-lasting color.
Load the Brush with Product:
Dip the lip brush into your chosen lip product. Ensure that the brush picks up enough product for one application but isn’t overloaded, as this can lead to uneven application.
Outline the Lips:
Use the lip brush to outline the edges of your lips. Start from the center of the upper lip and follow the natural contours to the corners. Repeat the process on the lower lip.
Fill In the Lips:
After outlining, use the lip brush to fill in the lips with color. Apply the product evenly, paying attention to the corners and Cupid’s bow.
Blend for a Natural Look:
If you’re using a lip product that allows blending, use the lip brush to blend the color for a more natural look. This is particularly useful for bold or dark shades.
Create a Defined Cupid’s Bow:
Use the pointed tip of the lip brush to create a defined Cupid’s bow. This adds precision to your lip shape and enhances the overall appearance.
Correct Mistakes:
If you make any mistakes or want to perfect the edges, use the lip brush with a bit of concealer to clean up and define the lip lines.
Layer for Intensity (Optional):
For more intense color, you can layer the lip product by applying additional coats with the lip brush. This helps build up the color gradually.
Use with Lip Liner (Optional):
Pair the lip brush with a lip liner to achieve an even more defined and long-lasting lip look. Outline and fill in your lips with the lip liner before applying the lip color with the brush.
Clean the Brush After Use:
After applying your lip product, clean the lip brush with a gentle brush cleaner or mild soap to maintain its hygiene and performance. Using a lip brush gives you greater control over your lip color application, allowing you to achieve a professional and well-defined finish. It’s a useful tool, especially for intricate lip looks or when working with bold and vibrant shades.
Lip Liner Brush:
Designed specifically for applying lip liner, the Lip Liner Brush features firm and angled bristles to outline and shape the lips with precision. Dive into the world of creating a clean and defined lip contour, exploring the nuances of lip liner application. A lip liner brush is a specialized tool designed for precise and controlled application of lip liner. It allows you to define the edges of your lips, create a crisp outline, and enhance the longevity of your lip color. Here’s a guide on how to use a lip liner brush effectively:
Select the Right Brush:
Choose a lip liner brush with thin, firm, and angled bristles. The angled shape helps with precise application, and the firmness of the bristles allows for control.
Clean the Brush:
Ensure that your lip liner brush is clean before each use. You can clean it with a mild brush cleanser or gentle soap and water. Allow it to dry completely before application.
Choose the Right Lip Liner:
Select a lip liner shade that matches your natural lip color or complements the lipstick or lip gloss you plan to apply. A well-matched lip liner helps define your lips without appearing too harsh.
Prepare Your Lips:
Begin with clean and moisturized lips. You can apply a thin layer of lip balm or primer if your lips are dry to create a smooth base.
Load the Brush with Product:
Dip the lip liner brush into your chosen lip liner. Ensure that the brush picks up enough product for one application without overloading it.
Outline the Lips:
Start by outlining the edges of your lips using the lip liner brush. Begin at the cupid’s bow and follow the natural contours of your lips. Take your time to create a precise and even line.
Extend the Outer Corners (Optional):
If you want to enhance the shape of your lips or create a specific look, you can slightly extend the outer corners of your lips using the lip liner brush. This can give the illusion of fuller lips or create a different lip shape.
Fill in the Lips (Optional):
After outlining, you can use the lip liner brush to fill in the entire lips with the lip liner. This step helps create a base for your lipstick or gloss, adds depth to the color, and improves the overall longevity of your lip makeup.
Blend for a Natural Look (Optional):
If you prefer a softer and more natural look, you can use the lip liner brush to blend the lip liner slightly into the center of your lips. This creates a seamless transition between the lip liner and the natural color of your lips.
Pair with Lipstick or Gloss:
Once you’ve applied the lip liner, you can proceed to apply your lipstick or lip gloss. The lip liner provides a guide for a more defined lip shape and helps prevent feathering or bleeding of the lip color.
Clean Up Edges (Optional):
If needed, use a concealer or foundation on a clean, small brush to clean up the edges and perfect the lip line. This step ensures a polished and professional finish.
Maintain Lip Liner Precision:
Regularly sharpen your lip liner pencil to maintain a fine tip, ensuring precise application. A well-sharpened lip liner allows for better control and accuracy. Using a lip liner brush allows you to achieve a defined and well-shaped lip outline, enhancing the overall appearance of your lip makeup. It’s a valuable tool for creating various lip looks, from natural to bold and dramatic.
Cleansing:
Cleansing your makeup brushes is not just a routine; it’s a ritual that ensures the longevity and hygiene of your beloved tools. Regular cleaning is paramount to prevent product buildup and bacterial growth, maintaining the brushes’ performance. Use a mild brush cleanser or gentle shampoo, creating a lather to cleanse the bristles thoroughly. Rinse the brushes with care, allowing them to air-dry completely to preserve their shape and integrity. Embrace the cleansing ritual as an essential step in your makeup journey, ensuring your brushes remain reliable companions in crafting beauty.
In conclusion, armed with the knowledge of these makeup brushes and their intricate uses, you are now equipped to embark on a journey of creativity and self-expression. Whether you are a makeup enthusiast or a professional artist, these brushes are your allies in the art of beauty. Happy brushing!


Leave a Reply